Add and show available/working or non working hours and days?
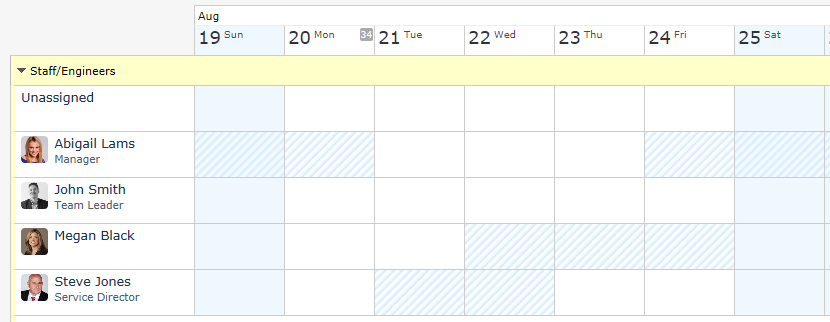
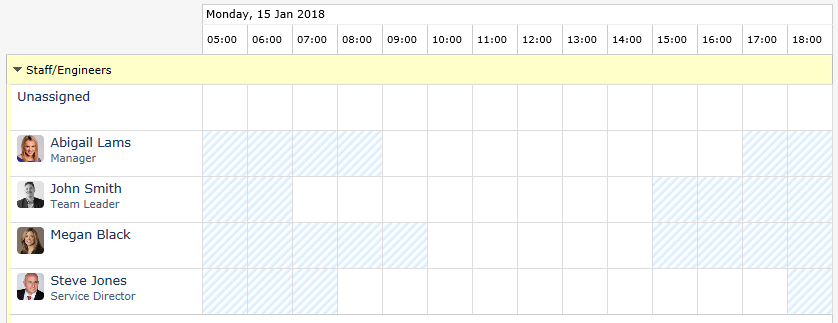
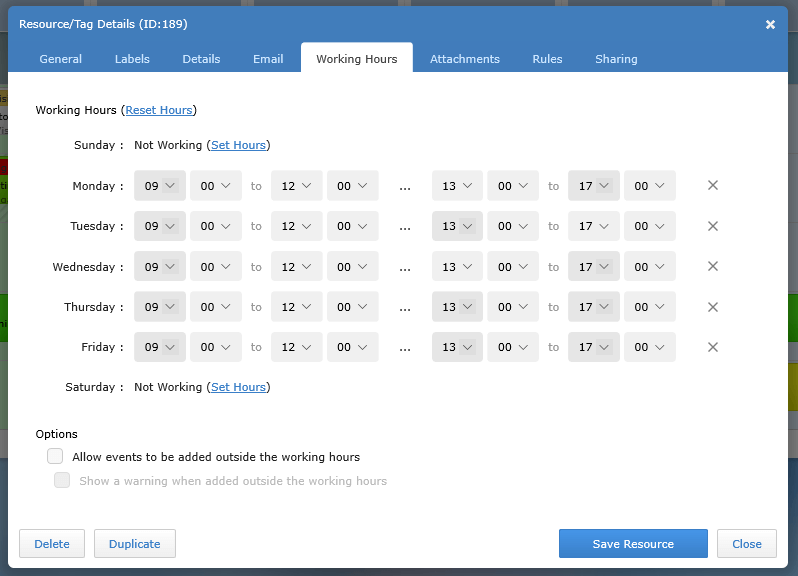
By editing each of your resources and choosing the Working Hours tab, you can enter the available working hours or days of the resource. These can then be used to highlight the working and non-working periods of time in their Timeline schedule to make planning and visualizing free space much easier.
When saving an event the working hours of every resource tagged in the event are checked. Events are only saved if the start and end of the event is inside the available working hours of every resource tagged in the event.


Edit any of your resources, either by clicking the pencil beside their name or from your Account Settings page, Groups & Resources, then pick any resource and choose the Working Hours tab to choose the working hours for that resource. You can set their morning hours, leave a reset or lunch break if they have one, then set their afternoon hours.

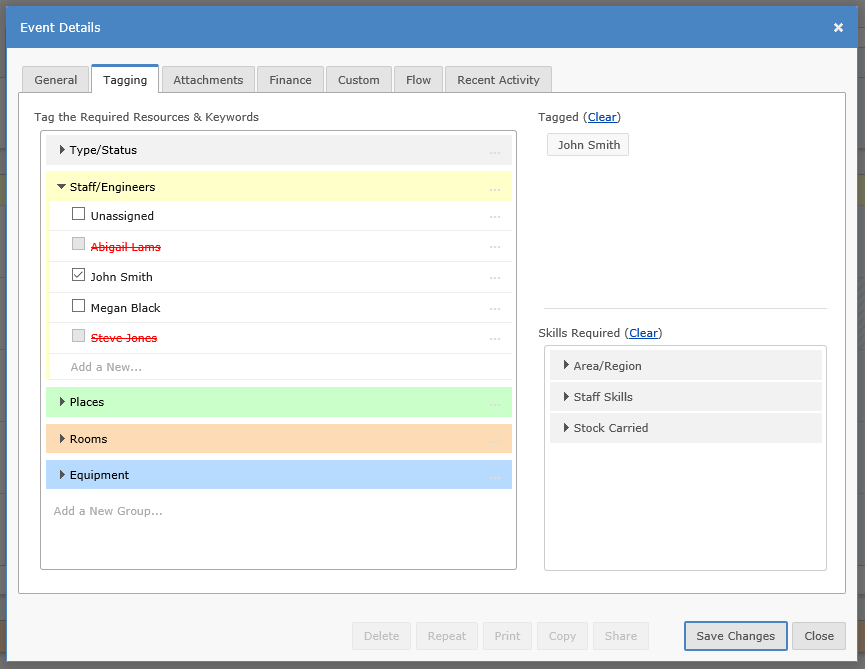
Once you have set the dates/times of the event, you can see which resources are available under the Tagging tab. Resources that are not available will be highlight red with a line through their name.

When saving an event the working hours of every resource tagged in the event are checked. Events are only saved if the start and end of the event is inside the available working hours of every resource tagged in the event.


Edit any of your resources, either by clicking the pencil beside their name or from your Account Settings page, Groups & Resources, then pick any resource and choose the Working Hours tab to choose the working hours for that resource. You can set their morning hours, leave a reset or lunch break if they have one, then set their afternoon hours.

Once you have set the dates/times of the event, you can see which resources are available under the Tagging tab. Resources that are not available will be highlight red with a line through their name.

Last updated, 19 October 2023, 19:57
Still need help? Contact Us
Join Us - Live Webinar
...
Close
Help Topics
Search
Contact Us
