Adding or editing users, access permissions and settings ?
User Permissions
In Schedule it you can add as many multiple users as you wish and restrict some of the functions they can and cannot see or access. Your license will only allow a specific number to login depending on the number you have purchased. The users you add can have different permissions, and different view and write access in the application.
Full access to your database file or SQL server is required for Schedule it to work correctly. Although the program has full access you can then add users, which need to login, to restrict the level of access, permissions, and activity you choose.
There are some actions that are only allowed by a user marked as an Administrator which are adding new users, editing settings for existing users, deleting emails from the email que, approving email addresses, and clearing items from the activity log.
Once you have added some users you can then disable general access and force all users to login. From the menu Tools/Options the first setting in the General section is 'Login Required to Open Database'. Once ticked all users must login to access the software and they will be given the permissions you have chosen for their login. The main admin account user the login name and password 'system'. You can change this to stop it being used be any user once you have confirmed other logins work for you.
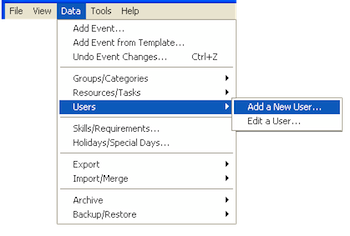
From the Data menu you can add or edit existing users. When adding or editing a user you can see the different options available. Most settings are as described but some settings are explained in more detail below.


Choose the event permissions that a user can access and even the specific fields or areas in an event.

Can See, allows you to choose which resources a user can or cannot see. This gives you the option to restrict individual groups or resources that the users needs to see.

Can Edit, allows you to choose which resources a user can link to an event or unlink from an event. Any event linked to a restricted resource will not be allowed be saved. Now you can use specific resources to block changes at an event level for specific users.

Email Alerts, allows you to specify a number of resources this user will receive email alerts for. This could be a manager with a team or group of resources and they will receive email alerts if any of their selected resources are booked or changed. User Alerts must be enabled in menu Tools/Options/Email Alerts.

Synchronising users, group and resources
After your initial synchronization, Users, Groups and Resources are NOT sent automatically they must be sent manually. Press the main Search icon on the toolbar to open the Search Window, select the tab Users, Groups or Resources, then press Search, you can then find the items you wish to send, then from Options button choose 'With ALL results' > 'Send to Web server'. This allows you to be selective about the data that is stored online.
Last updated, 22 January 2013, 10:31
Still need help? Contact Us
Join Us - Live Webinar
...
Close
Help Topics
Search
Contact Us
