Location and Schedule Map View of Users, Resources and Events
Using Locations for Events and Resources
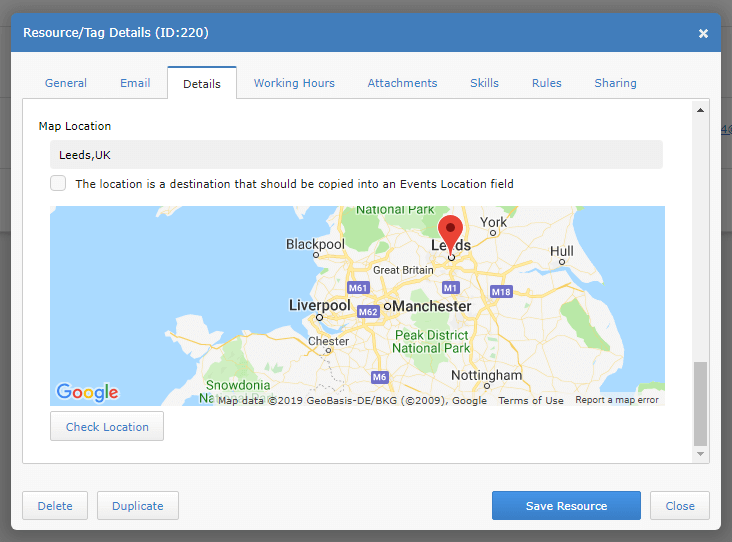
Each Event and Resource in your schedule can have a location. This Location information is also exported and accessible remotely when using our mobile app, via iCal and in email alerts, allowing external users to simply view or to get directions to the destination.If a resource/tag is a destination like a client or site you can enable the option The location is a destination at the bottom of the resources details page. With this option enabled the location will be automatically added to an event when the resource is tagged in the event removing the need to type addresses manually in any event.
As the location is used for mapping features, any event or resource that has no location should leave the Location field empty so that no errors are received when trying to visualize them on a real world map. Using None or N/A as a location is not advised.
Schedule Map View
Select the Map View from your View menu to visualise the location of resources, events and the live position of users. This map view can help you plan based on geographic data, view historical user movements and see the geographical distribution of your staff, sites or other assets. Only resources and events with a location can be viewed on the map.- Yellow pins show the location of planned Events and Tasks. The location of an event is taken from the events Location field. The track can show the order of events by their start date to help visualise the order and reduce overlaps.
- Green pins show the location of Resources. These can be your clients, sites, staff and any other important resources with a base address that is set in the Map Location field in their details.
- Blue pins the last location and movement history of Users. When Users use the Schedule it app their location can be tracked if they allow it in Account Settings > Location. This can show where they viewed their schedule, update events, checked in on arrival etc.
The Resources and Events that are shown on the map can be selected via the filter to narrow the results shown.
To enable and allow the location of remote Users to be detected they must allow our mobile app, or website, to use the devices location features. This is normally asked for when using the app or set in the devices privacy settings.

Travel Time and Distance
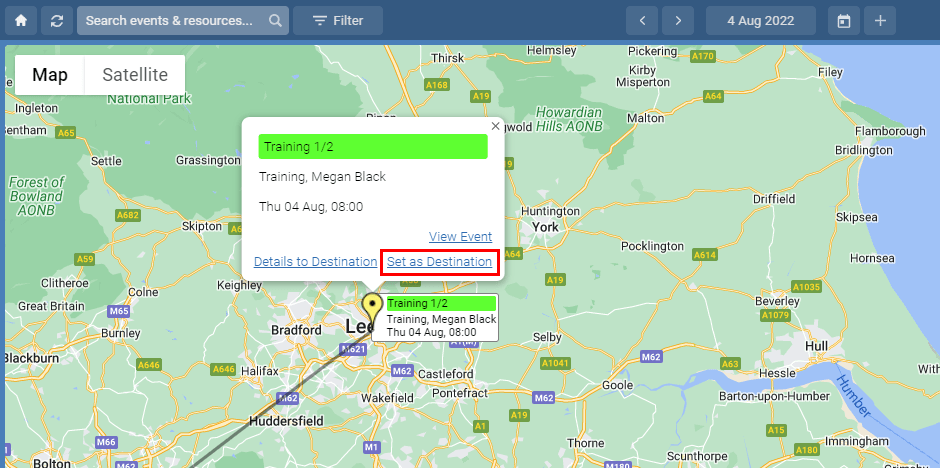
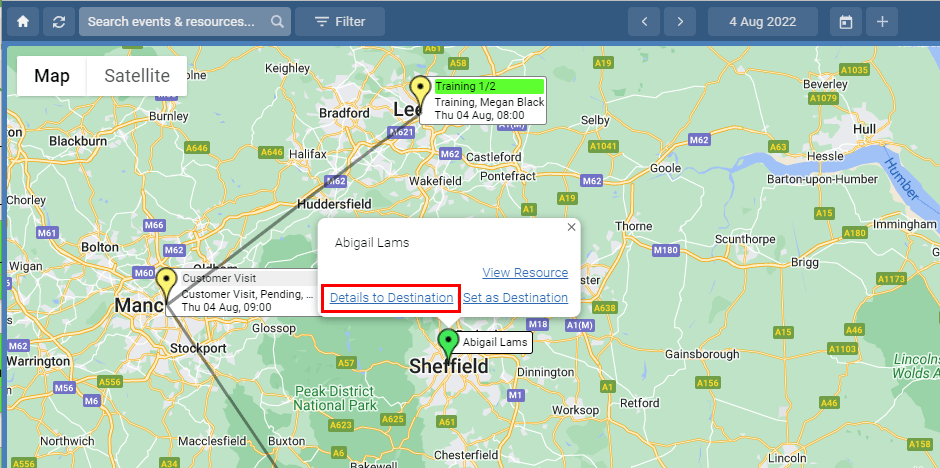
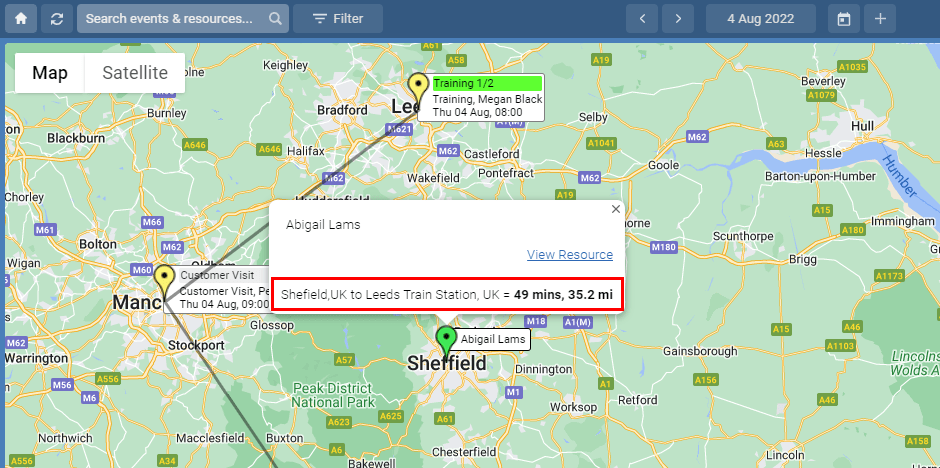
By clicking any pin on the map you can set it as destination point. Once a destination is set you can then click the pin of an actual user or resource to see the travel time and distance to the destination point set.You can use it to find the closet engineer to a job or site, find the time it would take for a number of instructors to travel to an event, get the distance between a number of fixed assets you may hold and much more.
Custom Locations
If you need to view a custom location that may not be a resource or event, you can now type that location into the quick search box and choose to view it on the map. This new pin can then be used to get travel time and distance between other pins (resources and events) on your map.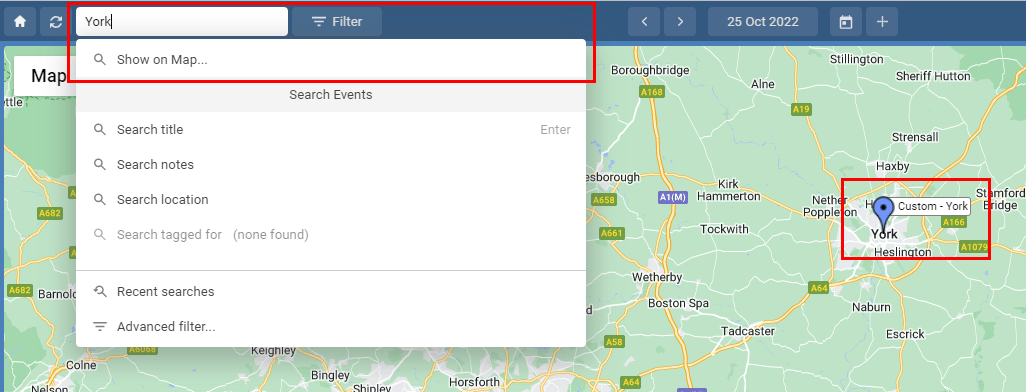
Contact us for more details and let us know how we can update the map view to help you more.
Still need help? Contact Us
Join Us - Live Webinar
...
Close
Help Topics
Search
Contact Us


